
Saturday, August 27, 2011
Accepted
I received notification today that Food Appeal has been accepted for an gallery exhibition! The show will be at Allied Arts of Yakima starting Sept 15. It is part of the Feast exhibit. This is a juried art show and the juror was Isaac Layman. The show will run through nearly the end of October. Below is a collage of the painting (the lower right picture) and a few digital manipulations.

Wednesday, August 17, 2011
On Burlap 3, Part 3
After some thought, I decided to not use a word stamp on the background. That said, I decided to tackle a past issue of paper buckling when sprayed with spray paint by coating the stencil with contact paper.


As an end note, this picture of my wife was taken during a Bright Eyes concert at The Gorge at George, Washington at the Sasquatch Music Festival 2011.
Update:
This is the picture taken in better light.


Coating the stencil with contact paper.
After contact paper was applied, it was time to cut the stencil.

The completed stencil. (Note: I added stencil supports to the image which will be removed during the touch-up phase.)
Next I needed to set the stencil on the background prior to spraying with paint. I've had a problem in the past with the propellant in the spray paint lifting the stencil. To prevent this, I flipped the stencil and applied poster putty (or ticky tack, or sticky tack, or whatever it's called...) to several points of the stencil. I centered the stencil on the background and applied masking tape to supply extra hold for the stencil and to mask the background. Time to apply spray paint (white, gloss enamel paint).

Halfway through the first of three layers of spray paint.
The spray paint dried for about one half hour before removal of tape and stencil. Removal of poster putty took a few minutes. I found that the poster putty did prevent some lifting of the stencil, but the tenacious spray paint did manage to diffuse through some areas still.

Poorly lit photo of spray-painted image after removal of stencil and poster putty. (Note: the stencil supports are visible.)
The last step in preparation of the image was touch up of the image using tube acrylics, both black and white. White acrylic paint was applied with a size 6 filbert brush to both touch up the spray paint and to block out the stencil supports. Black acrylic paint (applied with the same brush) was used to touch up around areas where spray paint had diffused beyond the desired limit in order to add greater definition to the image. I have not decided whether or not I will stretch this onto a gallery frame or leave it as a roll-able piece of burlap. The title of the piece has changed from Open up to Brighter in the open. (I'll replace this picture in the next few days after I can photograph it in better light.)

Brighter in the open. 48"x24". Aug 2011.
As an end note, this picture of my wife was taken during a Bright Eyes concert at The Gorge at George, Washington at the Sasquatch Music Festival 2011.
Update:
This is the picture taken in better light.

Brighter in the open. 48"x24". Aug 2011.
Monday, August 15, 2011
On Burlap 3, Part 2
Having stretched the burlap onto pieces of plywood, I applied gesso and was ready to begin the background layers. For the larger piece (4' x 6') I used household acrylic latex paint (some flat, some eggshell luster). I spooned the paint onto the canvas making drips and drops all over, but concentrating certain colors in specific general regions of the burlap. After paint application I rolled the paint around with a 4" Speedball brayer (it took some time), varying the pressure, length and direction of stroke as I went. After this was done I still had quite a bit of excess paint so I decided to squeegee the excess, pulling it from one end to the other and collecting it in an old jar so it can be stored and used later. I applied a little more color as desired and mixed and pulled it with the squeegee.


First layer of background for 4' x 6' picture. Household paints on gessoed burlap.
For the smaller picture (approximately 4' x 2'), I used tube acrylic paints, applying the red, yellow blue and white in diagonal strips which were worked/spread using the 4" Speedball brayer. After the paint dried, I applied black acrylic paint from a tube to various areas of the background and spread it using the brayer.

First and second layers of background on approximately 4' x 2' gessoed burlap.
On the smaller picture I plan to stencil on the picture below. This image is from my computer (MacBook Pro) and has been color adjusted for saturation, exposure and contrast. Not having a printer or a digital projector, I was not sure how to replicate this image on a large scale. I had some acrylic plates used for monoprinting still in my studio space so I created a grid using permanent markers and propped the piece of acrylic against my laptop screen.

Digital photograph on computer screen with 'analog' grid overlay.
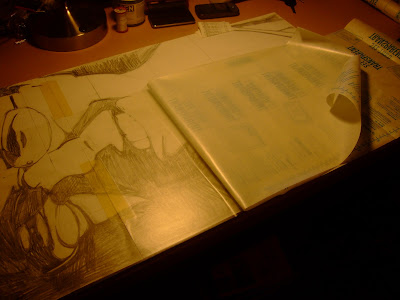
I taped together two pieces of Bristol at the proper dimensions, recreated the grid from the overlay (above picture) and proceeded to rescale the picture.

The next step will be to laminate the front of the picture prior to cutting the stencil. At the same time I will probably create a stamp for the background which will say 'Open Up.' I'll then spray paint the image onto the background, touch it up and...we'll see if it needs anything else.
Thursday, August 11, 2011
On Burlap 3, Part 1
I'm working on gessoed burlap for my third and fourth projects of this type. My fourth project will have dimensions like the first two (approximately 2' x 4'). Project three is larger and has dimensions of ~4' x ~6'. In the pictures I show the stretched burlap on the pieces of plywood. For this project I changed the process slightly by including a layer of plastic cling wrap underneath the pieces of burlap. This should prevent adhesion of the gesso to the plywood. While adhesion of the gesso to the plywood does create a desirable stippling effect in the final products (some gesso remains on the plywood after removal of the burlap, thus creating small holes in the painting which are effective as texture), my last project tore in one place. I was able to patch the whole with a black gessoes piece of burlap. I patched the hole with black acrylic paint and pressed the patch (patched from the back) and the painting between two acrylic panels and a lot of books. I left it for two days before uncovering it and letting it finish the drying process. It came out looking great.


Stretched canvas on plywood with plastic clingwrap. Plywood: 4'x8'. Burlap: ~4'x~6'.
Subscribe to:
Comments (Atom)