Monday, December 26, 2011

On Burlap 3, Part 6

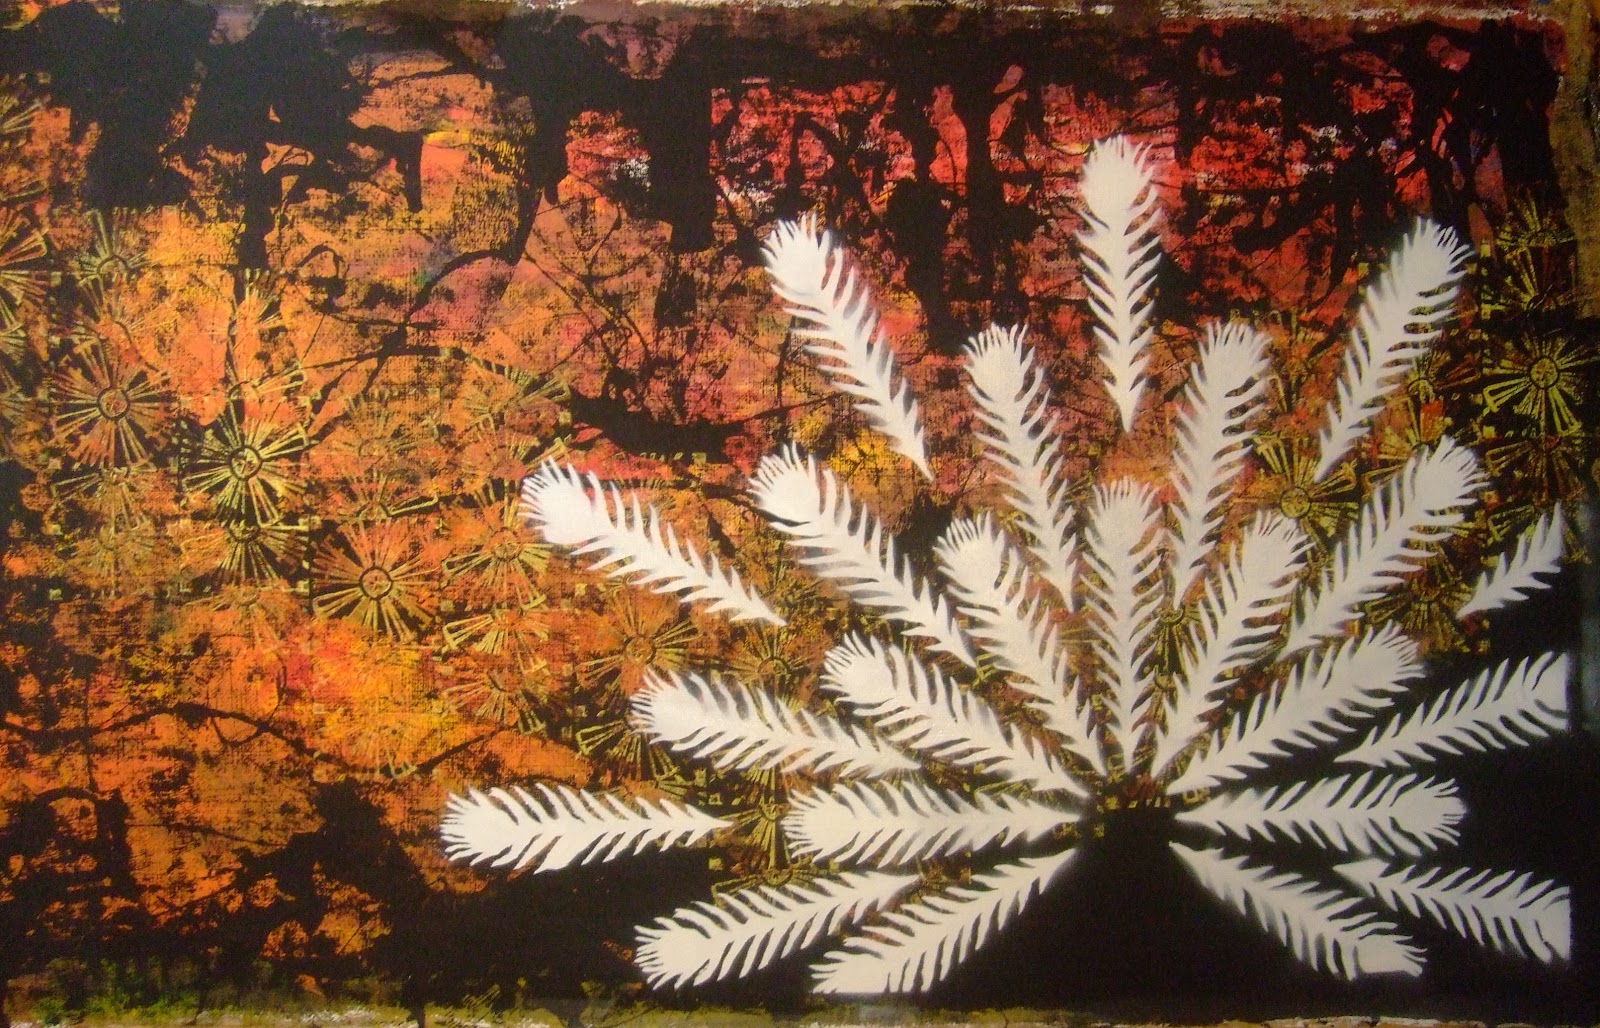
Work continues slowly. After cutting the stencil for the fan of feathers and placing it on the background, I found the Contact paper stencil was not adhering well to the acrylic (much of it had residual paper stuck to it). I left the picture alone for about 6 weeks while I tried to resolve the issue. Last week I was in a bookstore and came across Stencil 101 by Ed Roth. I was not interested in the included stencil. I was interested in a section describing the production of your own stencils. This hit me like a lightning bolt and I wondered, "Why has no one told me about this method before!?!" I read about Mylar sheets, stencil burners, pouncer brushes and spray-on, re-positionable adhesive! My answer was found. On the same trip I picked up all the supplies listed for future projects (Lincoln's head is on its way...), including the spray-on adhesive for use in this project. I carefully removed my stencil from the background, sprayed it with the adhesive, let it dry for sixty seconds (minimum) and replaced it on the background before applying the white spray paint. There were issues of the stencil not sticking in some places and the stencil curling in high-detail areas after the application of spray paint. This provided a nice amount of tolerable and interesting variation between feathers of the fan. After three coats of white paint I removed the stencil and the picture below is the result.

Have To (working title). 4'x7'.  Mixed media (acrylic, spray paint).

The next part will include the application of color, design and prints to the individual feathers. The final piece will be the character displaying the fan of feathers.

Monday, November 28, 2011

Small Work 2 + Tessellations

I continue to work on a couple small paintings. It's my palate cleanser and provides something to work on when I want more immediate results than my larger pieces (which are slowly coming along). I've used Contact paper to cover the acrylic and ink image, drawn on the plastic, removed it and cut it to provide custom pieces used for masking. It's allowed very clean lines and I've even masked some areas and stamped over the borders, allowing the creation depth in the picture. I've left the mask on the picture in the lower left corner of the painting. Once removed, the line of the central blue oval will be crisp.

Small painting. Blue Dot (working title). 24"x18". Mixed media.

I have recently been reading Designing Tessellations by Jinny Beyer. I've begun to design my own tiles and to print using some of the principles in the book. So far I'm liking the results.

A tile for tessellation. ~3.5" on a side.

Hexagonal tessellation pattern (eye-registered quick print).

I used the above tile for a background piece of a small (18"x24") watercolor. It's in early development. The tile is intended to create a string of crooked teeth, which will be replicated in the focal point of the painting. In this painting, too, I've used Contact paper for masking purposes.

Small watercolor/Rock Teeth (working title). Mixed media. 18"x24". Coldpress watercolor paper.

Sunday, October 30, 2011

On Burlap 3, Part 5 + Smaller Work

A few more things to add.

In the picture below, I was testing my makeshift movable stencil using the wire and contact paper. This was the result. The contact paper began to be affected by the spray paint after about 12 feathers. I had curling of the finely cut areas and the feather was progressively distorted. The spray paint began to build up and drip as is evident. This pattern was sprayed onto constructed panel of pieced-together Bristol paper. The assemblage was about 4' x 7'.

Test print of peacock feather tail.

I decided to use this tail pattern after trying a few other patterns. However, I want the perpendicular feather, 90 degrees from the horizontal, to be one of the outermost feathers. Therefore I slightly rotated the fan in the final design. Below is the backside of the assembled sheets of bristol. I've drawn on my guides for printing and placement of feathers.

Paper ready for peacock feathers.

After I printed the feathers on the paper, I covered the paper with transparent contact paper (three overlapping strips, each about 18" wide). I proceeded to cut out the stencil with a tiny blade (similar to an x-acto knife). Three hours later I had removed the contact paper from all the feathers and my next step will be to transfer the stencil to the prepared background (see background with working title To Have)

Application of contact paper to printed fan of peacock feathers.

-------------------

I started a smaller scale project a few days ago. It's acrylic and ink on cold press watercolor paper. I've created stencils of the main areas of the painting in order to manipulate the image with greater exactness and line clarity.

Untitled work in progress. Acrylic and ink on cold press watercolor paper. ~18"x24".

Monday, October 10, 2011

On Burlap 3, Part 4

I've not stopped. The work goes on, albeit at a reduced pace for a time. I have in the last month restrung the guidelines on my large acrylic piece, have to (updated title--lower case 'h'). The now all converge on a point in the lower right quadrant and present the basic form of the peacock fan of feathers. I have developed an easily adjustable stencil mounted to a wire frame which I will move from feather location to feather location.

The wire frame with applied stencil. Piece of Bristol paper held behind stencil to add contrast. Frame size approximately 18" x 24".

The stencil is cut out of contact paper and stuck to the printing side of my frame. I will position the frame and apply white spray paint (2-3 layers) followed by blue and green layering. I think I'll use a sheet like a 'rubber dam' around the frame to prevent unintentional application of spray paint to the image. I will then carve a linoblock and print the 'eyes' of the feathers individually.

Test image created with my feather stencil. High gloss black spray paint on Bristol paper. Feather approximately 15" x 4".

After this is complete, I need to find a model for use as a photographic reference for the final piece of the picture.

Monday, September 5, 2011

Lost / On Burlap 3 Part 4

I'm reading a field guide for getting lost (not sure of exact title). I'm taking the parts of the book slowly, digesting it for ideas and imagery as I go. A few passages already resonate with me and one has provided inspiration enough for one of my next paintings, which is already in early development and process. The passage is relayed through the author but from Virginia Woolf. To summarize, what we see of the woman/mother/devoted parent (or more generally, the person) is only the cicada emerging periodically whereas the person is actually a 'wedge of darkness' that spends most of their own time in the depths.

I started with gessoed burlap (about 4'x2') and have applied the first of several layers of acrylic which will create the background.


My large scale burlap picture (tentatively titled, "Have to") is further developed. I'm nearly done with the background production work. I'm currently working out the process of stencils for feathers. I have some ideas that should work but I 'm not sold completely on a single design and so I'll continue sketching. I'm also developing my ideas for a human model/study for the painting. I want the person to be male and to silently speak of desperation and ferocity, the cornered rat the will do what it needs to in order to survive.

The strings are held at even intervals by small nails in the edges of the plywood. The will serve as a guide for the stamp I made to be applied as part of the background.

This is the background after the first round of printing.

The background after the stamp highlights were added. This will be the final background (unless I decide it needs more).

Background detail of Have to (working title). Note: stamp itself is only 1/4 of the 'sunburst.' Acrylic paint was rolled on piece of acrylic plastic before stamp was pressed into spread ink and then pressed onto background.


Saturday, August 27, 2011

Accepted

I received notification today that Food Appeal has been accepted for an gallery exhibition! The show will be at Allied Arts of Yakima starting Sept 15. It is part of the Feast  exhibit. This is a juried art show and the juror was Isaac Layman. The show will run through nearly the end of October. Below is a collage of the painting (the lower right picture) and a few digital manipulations.


Wednesday, August 17, 2011

On Burlap 3, Part 3

After some thought, I decided to not use a word stamp on the background. That said, I decided to tackle a past issue of paper buckling when sprayed with spray paint by coating the stencil with contact paper.

Coating the stencil with contact paper.

After contact paper was applied, it was time to cut the stencil.

The completed stencil. (Note: I added stencil supports to the image which will be removed during the touch-up phase.)

Next I needed to set the stencil on the background prior to spraying with paint. I've had a problem in the past with the propellant in the spray paint lifting the stencil. To prevent this, I flipped the stencil and applied poster putty (or ticky tack, or sticky tack, or whatever it's called...) to several points of the stencil. I centered the stencil on the background and applied masking tape to supply extra hold for the stencil and to mask the background. Time to apply spray paint (white, gloss enamel paint).

Halfway through the first of three layers of spray paint.

The spray paint dried for about one half hour before removal of tape and stencil. Removal of poster putty took a few minutes. I found that the poster putty did prevent some lifting of the stencil, but the tenacious spray paint did manage to diffuse through some areas still.

Poorly lit photo of spray-painted image after removal of stencil and poster putty. (Note: the stencil supports are visible.)

The last step in preparation of the image was touch up of the image using tube acrylics, both black and white. White acrylic paint was applied with a size 6 filbert brush to both touch up the spray paint and to block out the stencil supports. Black acrylic paint (applied with the same brush) was used to touch up around areas where spray paint had diffused beyond the desired limit in order to add greater definition to the image. I have not decided whether or not I will stretch this onto a gallery frame or leave it as a roll-able piece of burlap. The title of the piece has changed from Open up to Brighter in the open. (I'll replace this picture in the next few days after I can photograph it in better light.)

Brighter in the open. 48"x24". Aug 2011.
As an end note, this picture of my wife was taken during a Bright Eyes concert at The Gorge at George, Washington at the Sasquatch Music Festival 2011.

Update:

This is the picture taken in better light.

Brighter in the open. 48"x24". Aug 2011.